 ENGLISH
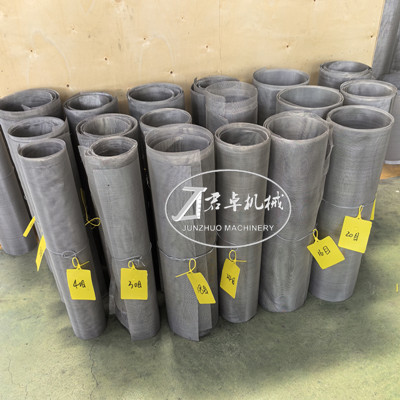

Copyright © 2019 JIANGYIN JUNZHUO MACHINERY MANUFACTURING CO., LTD All Rights Reserved. Site MapDesigned by iwonder.cn
 Professional machinery manufacturer
 JIANGYIN JUNZHUO
 jz@junzhuojx.com
 +86-0510-86382380

 Professional machinery manufacturer jz@junzhuojx.com
+86-0510-86382380
Professional machinery manufacturer jz@junzhuojx.com
+86-0510-86382380
Installation Steps and Precautions for Screens Sieves of Oscillating Granulator
Video Link: https://youtu.be/E6r8hs3CYZg?si=Q1oqbuXGDpVarCrA
.jpg")
Installing the screen sieve of an oscillating granulator is a critical operation. Proper installation ensures smooth granulation, uniform particle quality, and prevents equipment damage. Below are detailed steps and key precautions:
I. Pre-Installation Preparation
Safety First!
Ensure the equipment power is completely turned off and disconnected (preferably with a lockout-tagout to prevent accidental startup during installation).
Wear protective gloves to avoid scratches from sharp screen edges or equipment parts.
Cleaning
Thoroughly clean the screen installation area (including the screen bracket, rotor surface, and hopper) to remove residual old materials, dust, or debris. This prevents cross-contamination and ensures the screen fits tightly.
Component Inspection
Take out the new screen sieve and check for defects: deformation, cracks, broken wires (for wire mesh screen sieves), or burrs on hole edges (for perforated screen sieves). Do not use damaged screen sieves.
Inspect auxiliary parts: Check if the screen bracket, pressure ring, fixing bolts, and adjustment screws are intact (replace rusted or worn parts if necessary).
II. Step-by-Step Installation Process
The following takes the most common stainless steel wire mesh screen sieve as an example (the process for perforated screen sieve is similar):
Step 1: Open the Equipment Door/Cover
Loosen the latches, handles, or quick-release fasteners that secure the hopper or operation door.
Carefully open the door/cover to expose the internal screen installation area. Avoid collision with internal components during this process.
Step 2: Remove the Old Screen (if Replacing)
Locate the screen fixing devices (e.g., handwheels, hex bolts, or cam levers) and loosen them counterclockwise. Do not remove the fasteners completely—keep them handy for reinstallation.
Gently take out the old screen sieve. If the screen sieve is stuck due to material residue, use a soft brush to clean the contact area first; do not pull it forcefully to avoid damaging the bracket.
Step 3: Place the New Screen
Confirm Screen Direction: For wire mesh screen sieves, the smooth, burr-free side should face the rotor (the side that bears extrusion force); the rough, burr-containing side (from weaving) should face outward. If both sides are identical, direction is irrelevant.
Align and Position: Place the screen flat into the screen bracket (or screen frame). Ensure the screen edges fit into the groove completely, with uniform gaps around the perimeter (no offset or wrinkling).
Step 4: Secure the Screen Sieve
Install the pressure ring (or pressure cover) over the screen sieve, ensuring it covers the screen sieve’s edge evenly.
Tighten the fixing devices (handwheels/bolts) gradually and symmetrically. This prevents uneven pressure, which could cause screen sieve deformation or local looseness.
Key Tip: Stop tightening when you feel slight resistance—over-tightening will deform the screen sieve or pressure ring, while under-tightening will cause the screen to shift during operation.
Step 5: Adjust the Rotor-Screen Sieve Gap
This is one of the most critical steps, as the gap directly affects granule quality and screen lifespan.
Standard Gap: Typically 1–3 mm (adjust based on material properties).
Adjustment Method:
1. Locate the adjustment bolts at both ends of the rotor.
2. Use a feeler gauge to measure the gap between the rotor and screen (measure at 3–4 points around the roller to ensure uniformity).
3. Turn the adjustment bolts clockwise to reduce the gap, or counterclockwise to increase it.
Hazards of Improper Gap:
Too Small: Severe friction between the rotor and screen accelerates screen wear, increases motor load, and may generate heat that damages heat-sensitive materials.
Too Large: Insufficient extrusion force leads to low output, loose granules, or even failure to form granules.
Step 6: Manual Inspection and Close the Door/Cover
Before powering on, manually rotate the main shaft (or drive pulley) 1–2 full turns. Feel for smooth rotation—no jamming or scraping—and listen for abnormal noises.
If you feel resistance or hear scraping, stop immediately and recheck the screen alignment and rotor gap.
After confirming no issues, close the equipment door/cover and lock it securely.
Step 7: No-Load Test Run
Reconnect the power and start the equipment for a 10–15 second no-load run.
Observe and listen carefully:
Is the equipment running stably? No excessive vibration?
Are there abnormal sounds?
Does the screen remain fixed?
If everything is normal, the installation is complete. If abnormalities occur, shut down immediately, disconnect the power, and troubleshoot.
III. Core Precautions Summary
Never Work with Power On: Under no circumstances should you install, adjust, or inspect the screen while the equipment is powered on—this is a major safety hazard.
Keep the Screen Flat and Aligned: A misaligned or wrinkled screen causes uneven granule size and localized wear.
Prioritize Gap Adjustment: Treat the rotor-screen sieve gap as a "critical process parameter"—even a 0.5 mm deviation can affect production.
Uniform Pressure When Securing: Symmetrical tightening of fasteners ensures the screen sieve is stressed evenly, avoiding edge lifting or deformation.
Mandatory No-Load Test: The no-load run is the final check to catch issues before formal production, preventing material waste and equipment damage.
By following these steps, you can safely and correctly install the screen of an oscillating granulator. For first-time installation, it is recommended to operate under the guidance of experienced personnel or refer to the equipment’s official manual for model-specific details.
By continuing to use the site you agree to our privacy policy Terms and Conditions.
